Experiment: AFG to DSOX Loopback Validation (Plug-and-Play)
This document summarizes the end-to-end validation of the integrated signal chain between the Tektronix AFG3022C (Signal Source) and the Keysight DSOX2002A (Capture). This specific experiment focused on Zero-Config Discovery (AUTO Mode).
Hardware Setup
- Source: Tektronix AFG3022C connected via LAN.
- Capture: Keysight DSOX2002A connected via USB.
- Interconnect: BNC Output 1 (AFG) → BNC Input 1 (DSOX).
Essential Device Configuration
For the automated discovery to succeed on macOS, the following physical settings were required:
Keysight DSOX2002A (USB Discovery)
[!IMPORTANT] Enable Compatibility Mode: By default, the DSOX may not appear as a standard USB-TMC device. 1. Press the [Utility] key on the front panel. 2. Select I/O → USB. 3. Ensure the mode is set to USB-TMC (or "Compatibility Mode" depending on firmware version). 4. Once enabled, the device will appear as
USB0::0x0957::0x179B::...::INSTR.
Tektronix AFG3022C (LAN Discovery)
- Static IP: Assigned
169.254.105.101for direct peer-to-peer connection. - VXI-11: Ensure the VXI-11 server is enabled in the network settings.
The "AUTO" Discovery Process
We validated the HAL's ability to find these instruments without any hardcoded addresses.
How it works (Step-by-Step):
- USB Scan: The HAL calls
pyvisa.ResourceManager().list_resources()to find the DSOX on the USB bus. - Smart LAN Probe: If an instrument (like the AFG) isn't on USB, the HAL performs a Smart ARP Scan of the local subnet (
169.254.x.x). - Identity Verification: The HAL connects to every found address and queries
*IDN?. - Type-Aware Routing: Even if the scan finds multiple Keysight or Tektronix devices, it only returns a match that fits the requested category (e.g., ignoring a Scope when a Signal Generator is requested).
Validation Script
The final validation used zero hardcoded addresses:
from instrumation.factory import get_instrument

# 1. The HAL 'hunts' for the Signal Generator and Scope
afg = get_instrument("AUTO", "SG")
dso = get_instrument("AUTO", "SCOPE")

print(f"AFG Found at: {afg.resource}")
print(f"DSO Found at: {dso.resource}")

# 2. Standard Loopback Procedure
afg.preset()
afg.set_waveform("SQU")
afg.set_frequency(100e3)
afg.set_voltage(1.5)
afg.set_output(True)

dso.auto_scale()
trace = dso.get_waveform(1)

# 4. Data Analysis & Visualization
import numpy as np
import matplotlib.pyplot as plt

y_data = np.array(trace.value)
x_data = np.linspace(0, 1, len(y_data))

plt.figure(figsize=(12, 6))
plt.plot(x_data, y_data, color='#007AFF', label='CH1 (AFG Output)')
plt.title("AFG to DSOX Loopback Validation")
plt.xlabel("Normalized Time")
plt.ylabel("Amplitude (Volts)")
plt.grid(True, linestyle='--', alpha=0.7)
plt.savefig("../assets/afg_dso_loopback.png")
plt.show()

# 5. Cleanup
afg.set_output(False)
Results
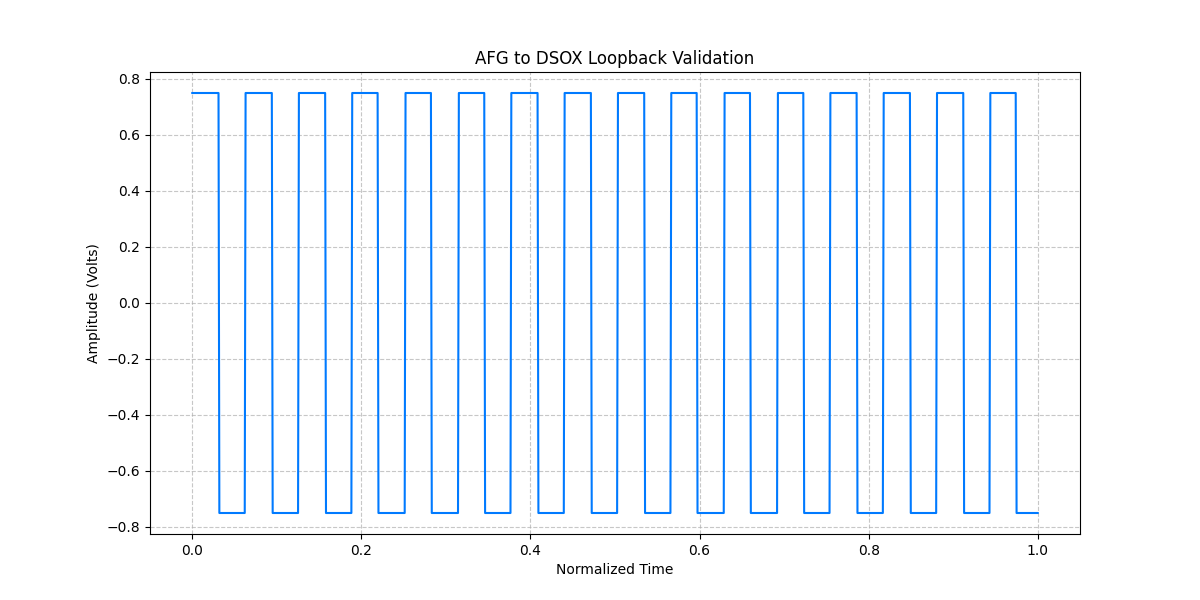
The experiment successfully verified that AUTO mode is robust for both high-speed USB-TMC and network-based VXI-11 protocols.
Visual Validation
Conclusion
The instrumation HAL now supports true plug-and-play operation for the entire RF test bench. By combining ARP probing with USB scanning, the system eliminates the need for manual IP configuration in test scripts.